White Glove Seat Cover Installation: DIY vs Professional (2026)
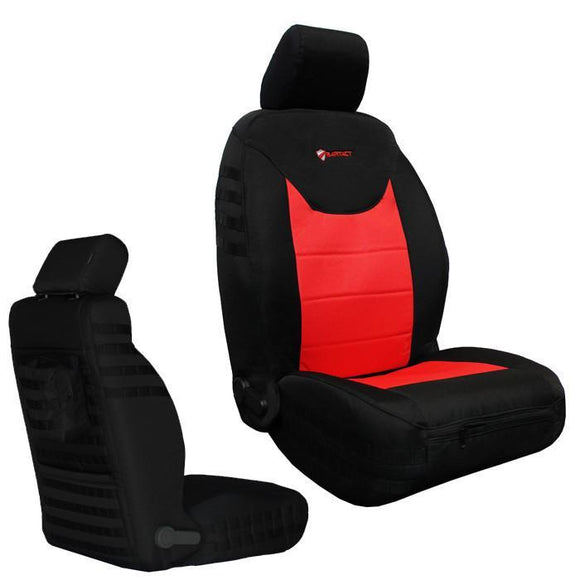
Installing tactical seat covers is one of the biggest decisions you'll make after buying them. Not because the covers are complicated — most modern tactical covers, especially Bartact and similar brands, are designed for straightforward installation. The decision is really about time, skill, and whether you want to get it right the first time.
Some truck owners love the DIY challenge. They'll spend an afternoon on YouTube, grab some basic tools, and have their Bartact covers perfectly fitted within a few hours. Others prefer to drop their truck at a professional installer and pick it up with perfect stitching and no wrinkles.
Both paths work. The question is which one makes sense for you, your truck, and your specific covers. Let's break down the real costs, skill requirements, and trade-offs so you can make an informed choice.
What Makes Tactical Seat Covers Easier to Install Than Ever
The good news: tactical seat covers have become significantly easier to install in the last few years. Modern covers from Bartact, Smittybilt, and other manufacturers are designed with installation in mind, not as an afterthought.
Bartact covers in particular have several built-in advantages:
- Real MOLLE webbing: The PALS (Pouch Attachment Ladder System) webbing means covers attach to seats using proper anchor points, not guesswork.
- Pre-formed shapes: Covers are cut and sewn to fit specific vehicles, not generic universal sizes that require trimming and customization.
- Bar Tack reinforced seams: Heavy-duty bar tack stitching at stress points means the covers hold shape even if you don't get every detail perfect during installation.
- Stretch materials: Many tactical covers use stretch neoprene or poly-cotton blends that forgive minor fitting inconsistencies.
Compare this to generic seat covers from 10 years ago that required extensive modification, cutting, and careful hand-stitching just to fit properly. Modern tactical covers are designed to be installed by truck owners who understand their vehicles, not professional upholsterers.
The DIY Path: Time, Tools, and What You Actually Need
If you're planning to install your tactical covers yourself, here's what you're really looking at:
Time Required
Expect 2–4 hours for a complete front-seat installation on a truck or Jeep. This assumes:
- You've watched an installation video or read a guide beforehand (not learning as you go)
- You're installing a brand like Bartact, Smittybilt G.E.A.R., or similar modern tactical covers
- Your vehicle is in good condition with no unusual seat structure complications
- You're not obsessing over micro-adjustments or perfect wrinkle-free fitting
For a full-truck installation (front and rear seats), add 4–6 hours. If you're working on a vehicle with unusual seat structures (certain Jeep models, older trucks with bench seats), add 1–2 hours.
First-time installations typically run 30% longer than these estimates. That's normal and expected.
Tools You Actually Need
You don't need much. Here's the real toolkit:
| Tool | Why It Matters | Essential? |
|---|---|---|
| Panel removal tool (plastic pry bar) | Safely removes interior trim panels without damaging clips. Much better than a screwdriver. | Yes |
| Socket set (metric + SAE) | Removes seat bolts. Most trucks use 13mm or 15mm bolts, but having a full set prevents frustration. | Yes |
| Torque wrench | Ensures seat bolts are tight enough for safety (typically 20–30 lb-ft) without over-tightening. | Highly recommended |
| Flathead and Phillips screwdrivers | Remove clips, plastic connectors, and smaller trim pieces. | Yes |
| Wire cutters or trim tool | Carefully trim any excess cover material. Bartact covers are pre-sized, but you may need minor adjustments. | Optional |
| Sewing needle + thread (matching color) | Hand-stitches any small gaps or loose edges. Not always needed, but useful to have. | Optional |
| Vacuum with brush attachment | Cleans seats before installation. Improves fit and appearance. | Recommended |
Most of these tools cost under $100 total if you don't already own them. If you have a basic socket set and a screwdriver, you're mostly ready.
The Installation Process (Simplified)
Here's what the actual work looks like for a typical truck:
- Disconnect battery: Always disconnect the negative terminal on the battery before removing seats. This prevents airbag system issues.
- Remove trim and panels: Take off the seat bottom trim, speaker panels, or console pieces that are in the way. This typically takes 15–30 minutes.
- Unbolts seats: Unbolt the seat from the truck floor. Most trucks have 4 bolts per seat. Set them in a labeled container so you remember where they go.
- Remove seats from truck: Carefully lift seats out (sometimes they're heavy and awkwardly shaped — recruit a helper if possible).
- Install covers on seats: This is the actual assembly part. You'll slide or wrap the cover material onto the seat structure, securing it with MOLLE webbing attachments or fasteners. Bartact covers have clear documentation for this step.
- Reinstall seats in truck: Place seats back in the truck, align them, and re-bolt them in place. Use your torque wrench to ensure bolts are tight.
- Test fit and adjust: Once seats are back, sit in them, check for wrinkles or gaps, and make minor adjustments as needed.
- Reconnect battery and test electronics: Reconnect the battery and test seat heating (if applicable) and any seat adjustments.
The most common mistakes happen in steps 3–5. Bolts that are too loose can cause seats to shift during driving (dangerous). Covers that aren't seated properly on the cushion will wrinkle and won't look finished. Reconnection issues (forgetting the battery or not seating connectors fully) cause warning lights on the dash.
When DIY Makes Sense
DIY installation is a solid choice if you meet most of these criteria:
- You've installed car parts before (even something as simple as floor mats or a car stereo counts)
- You have basic tools and aren't afraid to use them
- Your truck is modern enough that YouTube has installation guides for your specific model
- You have 4–6 hours of uninterrupted time in your schedule
- You're comfortable with minor imperfections or willing to watch videos multiple times to get it right
- Your truck is in a garage or covered area where you can work safely
- You're willing to call a professional if something goes wrong mid-installation
If you check most of these boxes, DIY installation will save you $200–$400 and give you satisfaction that you did the work yourself.
The Professional Installation Path: Speed and Perfection
Professional installation is where the term "white glove" comes from. A professional installer doesn't just bolt covers on — they ensure perfect fit, alignment, and finishing touches that make the installation look like it came from the factory.
What Professional Installers Actually Do
Good professional installers, especially those experienced with tactical covers, will:
- Inspect your seats before work begins: They'll check for existing damage, stains, or issues that might affect the cover fit.
- Custom fit the covers: They'll adjust and trim material as needed for your specific vehicle and seat configuration, not just follow the box instructions.
- Ensure perfect alignment: They'll spend time getting wrinkles out and ensuring the cover is symmetrical on both sides of the seat.
- Protect electronics: They know how to properly disconnect and reconnect seat electronics without causing warning lights or airbag issues.
- Quality check: They'll test everything — seat adjustments, heating functions, cover security — before you pick up the truck.
- Warranty the work: Good installers offer a warranty on the installation. If something fails or a seam comes loose, they'll fix it for free.
This attention to detail is what separates a "good enough" DIY installation from a professional-grade result.
Cost of Professional Installation
Professional installation typically costs:
| Service | Typical Cost Range | Time Required |
|---|---|---|
| Front seats only | $200–$350 | 3–4 hours |
| Front + rear seats | $350–$600 | 5–8 hours |
| Additional custom work (console covers, rear panels) | +$75–$150 per item | 1–2 hours |
| Rush service (1-day turnaround) | +25–50% labor cost | Same day |
These prices assume labor only — your covers are included in the purchase price. Prices vary by region and installer expertise. Urban areas tend to run 20–30% higher than rural areas.
Finding a Good Professional Installer
Not all upholstery shops or mobile installers are created equal. When looking for someone to install your tactical covers, ask for:
- Experience with tactical covers: Find someone who has installed Bartact, Smittybilt G.E.A.R., or similar brands before. They understand MOLLE systems and bar tack stitching.
- Photos of past work: Ask to see installation photos. Good installers have portfolios. Look for wrinkle-free, symmetrical covers and clean finishing.
- Warranty policy: They should offer at least a 1-year warranty on the installation. If they won't, that's a red flag.
- References: Call or text a previous customer. Ask if they'd use the installer again.
- Pricing transparency: Get a quote in writing before dropping your truck off. No surprises.
- Turnaround time: Confirm how long the work will take. Professional installers should be able to do front seats in 3–4 hours, full truck in 5–8 hours.
Check local upholstery shops, mobile auto detailers, and Bartact retailers. Many Bartact dealers offer installation services or can recommend trusted local installers.
Head-to-Head Comparison: DIY vs Professional
✓ Saves $200–$400 in labor
✓ Learn about your truck's seat structure
✓ Work on your own schedule
✓ Satisfaction of doing it yourself
✗ Takes 4–6 hours of your time
✗ Risk of minor mistakes (wrinkles, loose bolts)
✗ No warranty if something goes wrong
✗ May require calling a pro if you get stuck
✓ Perfect fit and alignment every time
✓ Done in 3–4 hours (vs your 4–6 hours)
✓ Warranty on the work
✓ Professional handles electronics safely
✓ You can drop it off and pick it up
✗ Costs $200–$600 depending on scope
✗ Need to schedule an appointment
✗ Less personal satisfaction
When to Choose Each Option
Choose DIY if:
- You own a modern truck (2010+) with common seat structures and YouTube guides available
- You enjoy working on your vehicle and have completed similar projects
- Budget is a primary concern and you have the time
- You're not worried about micro-imperfections
- Your truck is easily accessible for work (garage, covered space)
Choose Professional if:
- Your truck is older, unusual, or has complex seat structures
- You don't have time for a full afternoon of work
- You want a factory-finish result with no wrinkles or imperfections
- You want a warranty on the installation work
- You're uncomfortable working with electronics or electrical systems
- This is your first tactical cover installation
Common Installation Mistakes to Avoid
Whether you go DIY or professional, knowing these common mistakes can help you catch problems early:
- Bolts that are too loose: Seats should not shift or move when you push on them hard. Under-tightened bolts are a safety issue. Use a torque wrench if possible.
- Covers not fully seated on cushions: If the cover bunches or wrinkles at the edges, it's not pulled tight enough. This looks unfinished and causes premature wear.
- Forgetting to reconnect battery: DIY installers sometimes forget to reconnect the battery, or they reconnect it while trim panels are off, causing dashboard warning lights.
- Damaging seat electronics: Disconnecting seat heaters, lumbar support, or power adjustment connectors without care can cause them to fail. Professionals know how to handle these safely.
- Over-trimming material: If you cut away too much cover material, you can't undo it. Start with conservative trimming and adjust.
- Unequal side installation: Install both seats identically. If one side looks different, it's immediately noticeable.
The Real Cost-Benefit Analysis
Let's talk dollars and sense. Your tactical covers cost $300–$800 depending on the brand and coverage level. Installation is a one-time cost that you'll live with for years.
DIY Cost: $0–$100 (if you don't already have tools). Time cost: 4–6 hours.
Professional Cost: $200–$600. Time cost: 30 minutes to drop off and pick up.
If your hourly rate is $30 or less, DIY saves money. If your hourly rate is $50+, professional installation saves you the equivalent of $200–$300 in time value. If you value your weekend time highly or don't enjoy working on cars, professional is the clear winner.
Final Verdict
Both paths are legitimate. DIY installation works great for confident truck owners with basic mechanical skills. Professional installation delivers perfection and peace of mind.
The best choice depends on your skills, time, budget, and what "done right" means to you. If you're on the fence, ask the retailer where you bought your covers — they often have referrals for trusted local installers, and they may even offer discounted installation as a package deal with your cover purchase.
Either way, you're getting tactical covers on your seats, and you're protecting your investment for years to come. That's what matters.
Ready to install? Explore our full range of tactical seat covers for trucks and Jeeps.
Find Your Vehicle